Set Up for DocuSign e-Signature
To set up DocuSign, perform these steps:
-
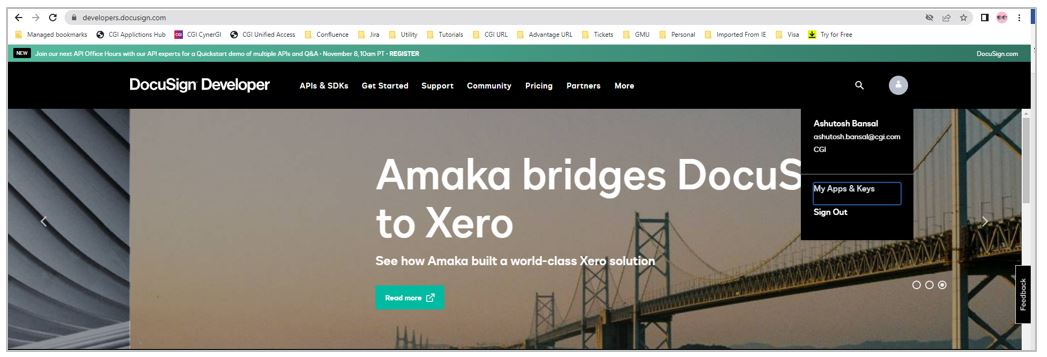
Create a DocuSign developer’s account here: https://developers.docusign.com/.
-
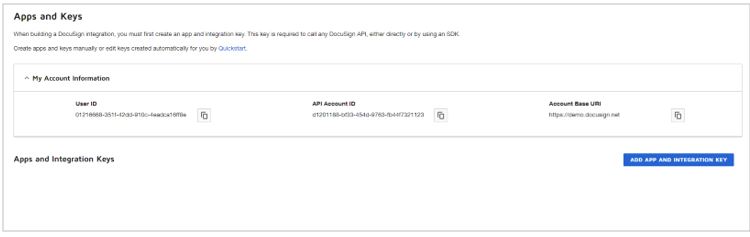
Once logged in, navigate to “My Apps and Keys” as shown below:
-
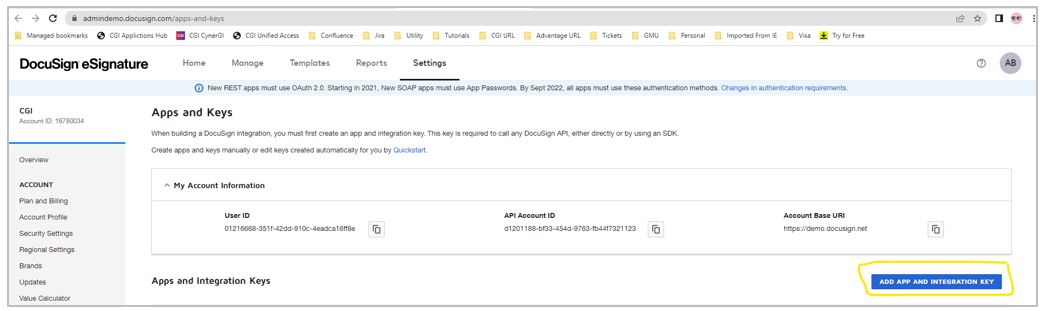
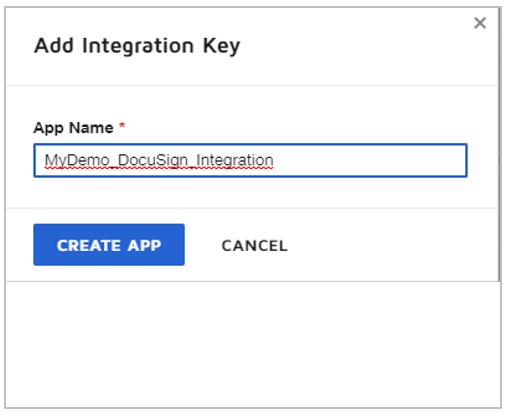
On the “Apps and Keys” page, click the ADD APP AND INTEGRATION KEY button.
-
In the pop-up window, provide the application name and click the CREATE APP button.
-
On the next page, first you need to generate the RSA public key and then upload it to DocuSign.
To generate the public key, please follow the below steps:
-
Navigate to the location of the “advsignerkeystore.p12” file and execute the following command.
openssl pkcs12 -info -in advsignerkeystore.p12 -nodes
-
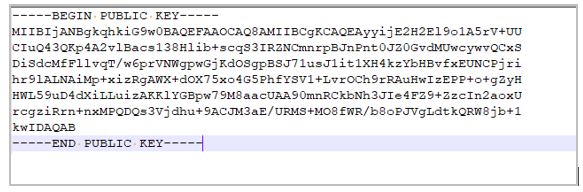
Copy the private key in the (private.pem) file generated from the previous command:

-
Now, execute the following command to generate the public key:
openssl rsa -in private.pem -outform PEM -pubout -out public.pem
The public key will be stored in public.pem file. This value will be used in step 7.
-
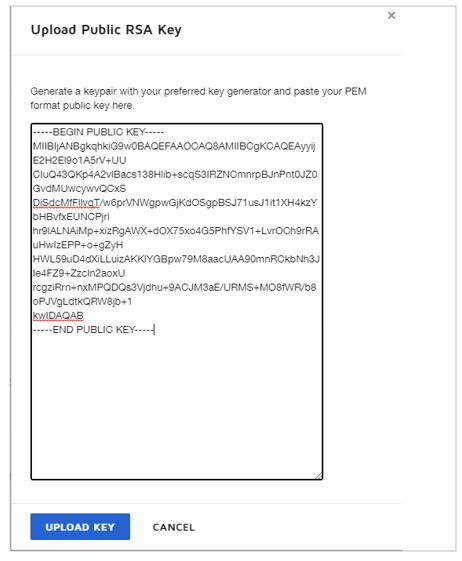
Click the UPLOAD RSA button.

-
Click the UPLOAD Key button and paste the Public key generated in step 5.
-
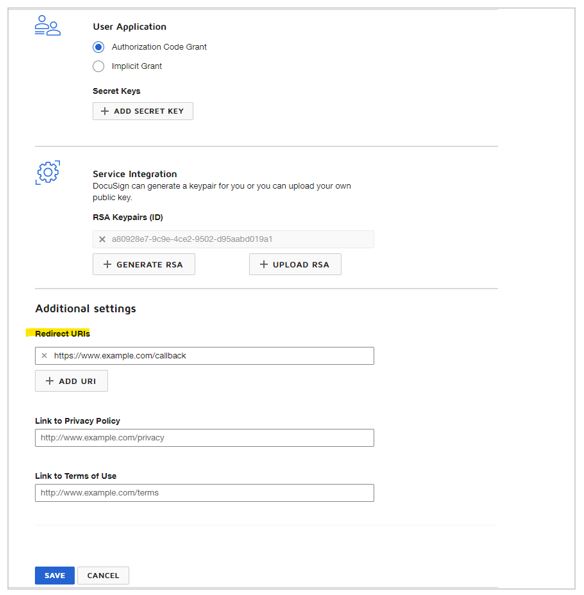
Add a Redirect URIs as https://www.example.com/callback. Click the SAVE button.
-
Please note that the app created is in development mode. This is useful for testing purposes. For a production environment, you need to move the app to production by selecting “Start Go-Live review” on your DocuSign account.

-
Now, this application needs to give consent for embedded signing. In order to do that, go to the following URL (make sure to update the integration id): https://account-d.docusign.com/oauth/auth?response_type=code&scope=signature%20impersonation&client_id=<Your Integration_Id>&redirect_uri=https://www.example.com/callback

-
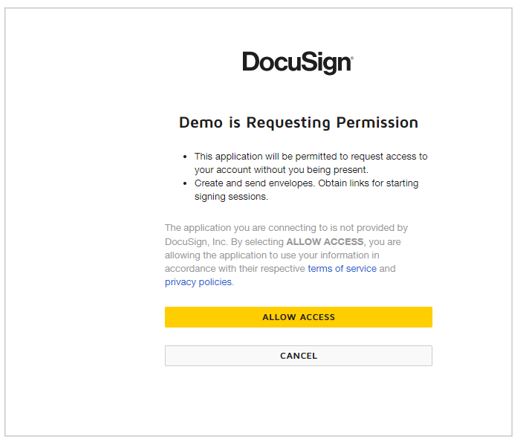
Once logged in to your DocuSign account, click the ALLOW ACCESS button to enable embedded signing.
-
The next step is to configure the DocuSign App information in the Advantage application on the ERPCTRL page.
|
Parameter Name |
Parameter Description |
|
DOCUSIGN_ACCOUNT_ID |
DocuSign Account Id |
|
DOCUSIGN_BASE_URI |
DocuSign base URI |
|
DOCUSIGN_BRAND_ID |
DocuSign brand Id |
|
DOCUSIGN_HOST_ENV |
DocuSign host environment |
|
DOCUSIGN_INTG_KEY |
DocuSign Integration Key |
|
DOCUSIGN_USER_ID |
DocuSign user Id |
|
DOCUSIGN_VERSION_NO |
DocuSign version number |
The DOCUSIGN_ACCOUNT_ID, DOCUSIGN_BASE_URI and DOCUSIGN_USER_ID can be referred from the “Apps and Keys” page of your DocuSign account.
The value for DOCUSIGN_HOST_ENV is “https://account-d.docusign.com” for development and “https://account.docusign.com” for production environments.
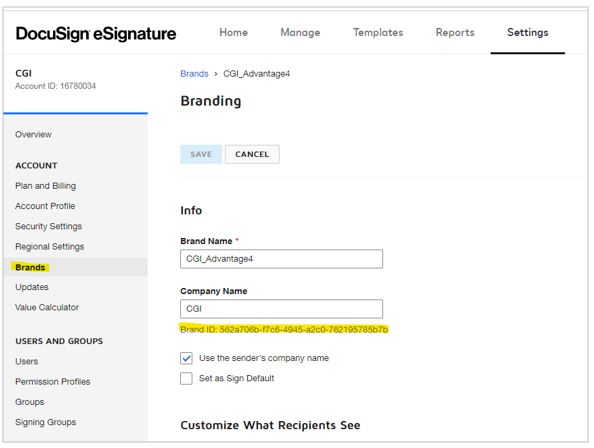
The value for DOCUSIGN_BRAND_ID can be set from your DocuSign account as shown below.
Creating a brand will enable you to configure the title, fonts and colors for your DocuSign window which appears during the signing process.
NOTE: Please download SSL certificate from https://account.docusign.com/oauth/token or https://account-d.docusign.com/oauth/token (based on your usage of developer vs production DocuSign app) and your DOCUSIGN_BASE_URL (example: https://demo.docusign.net).
These certificates must be added to ADV3.keystore file.
-
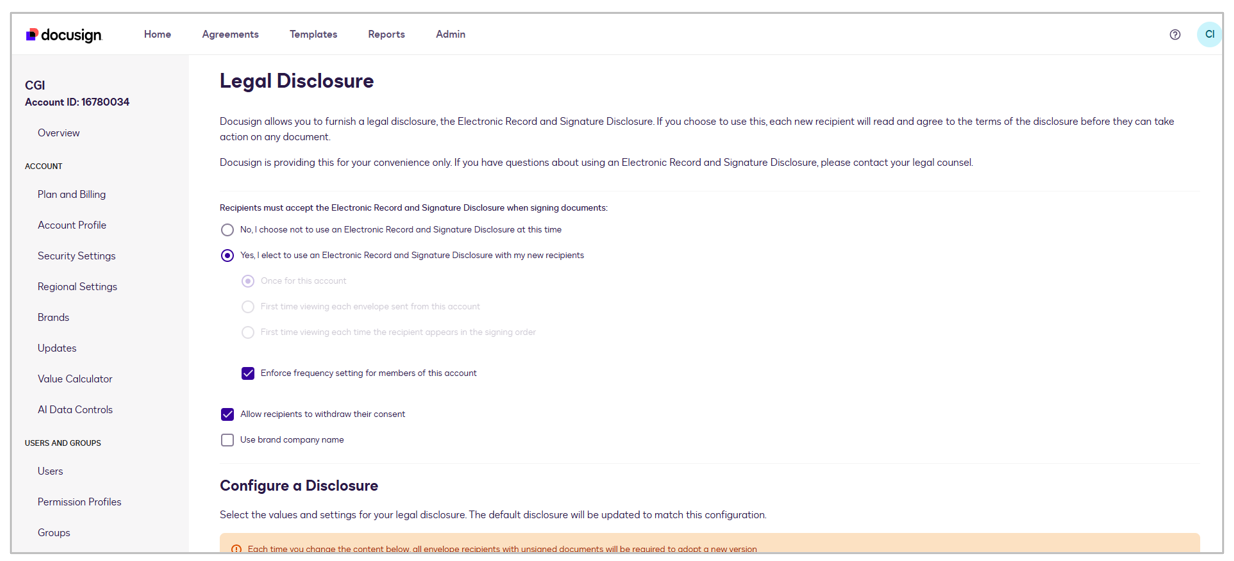
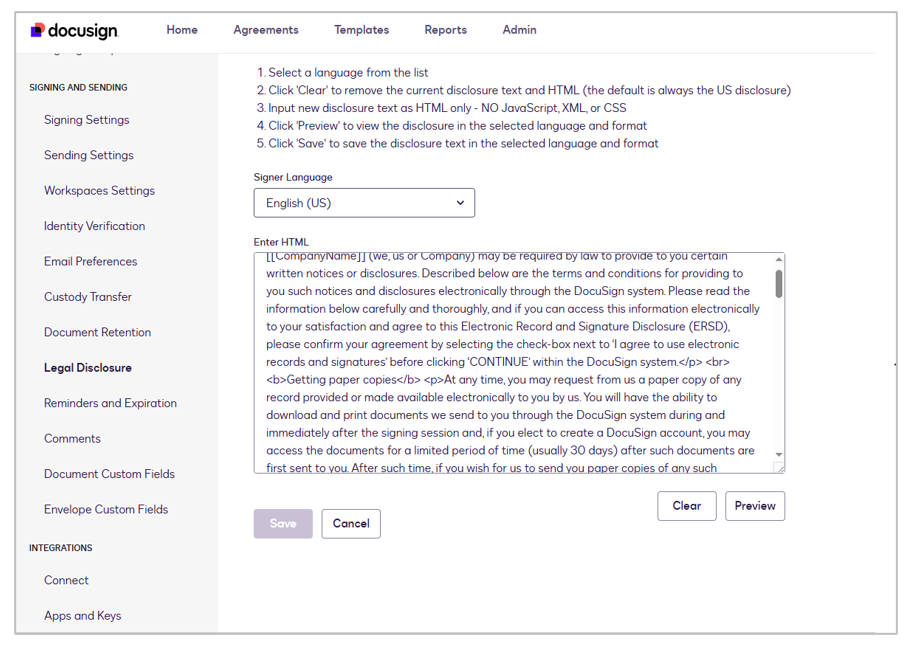
The legal disclosure text can be configured directly within the DocuSign portal. This disclosure is presented to all users and must be accepted before they can sign the transaction.