Authenticate SMTP Connection with Microsoft OAUTH
To authenticate the application with MS365 SMTP server via OAUTH, the application needs to be registered into Microsoft Entra. This process is essential for establishing a trust relationship between your application and the Microsoft identity platform.
Application Registration (Microsoft Entra ID)
-
Login to Microsoft Azure Portal where the user should have at a minimum an Application Developer role.
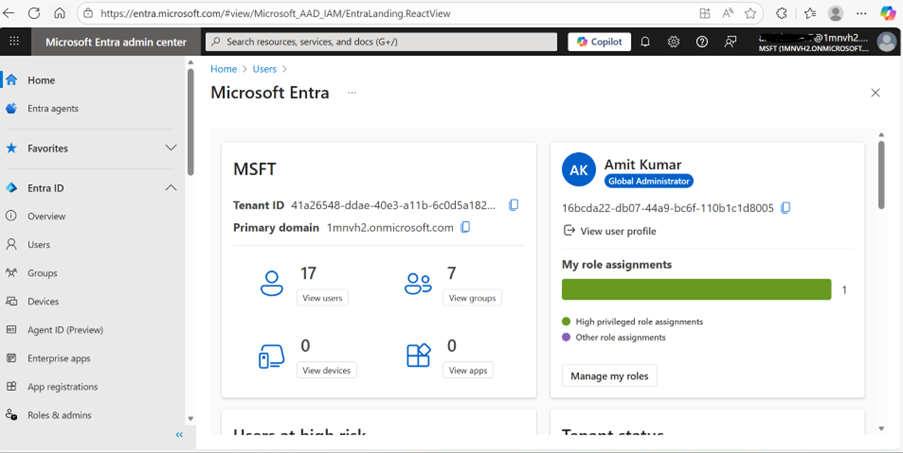
-
Search for App registrations in the search window and then select App registrations in the search results.
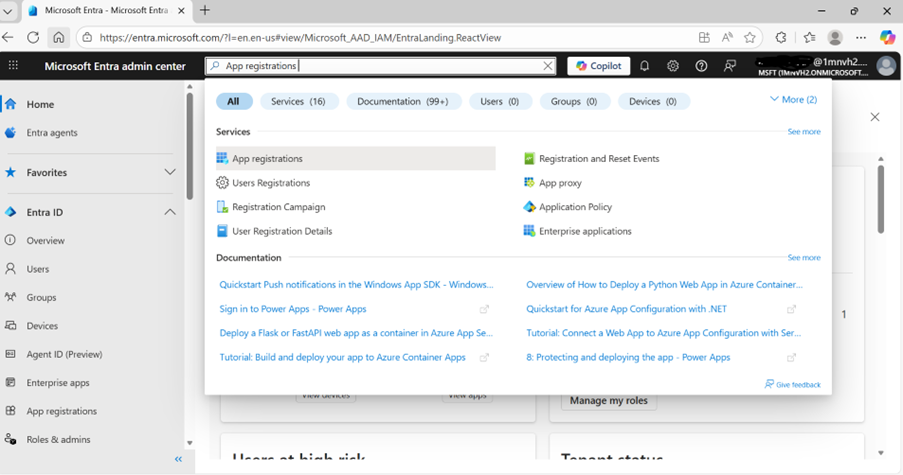
-
Click New registration.
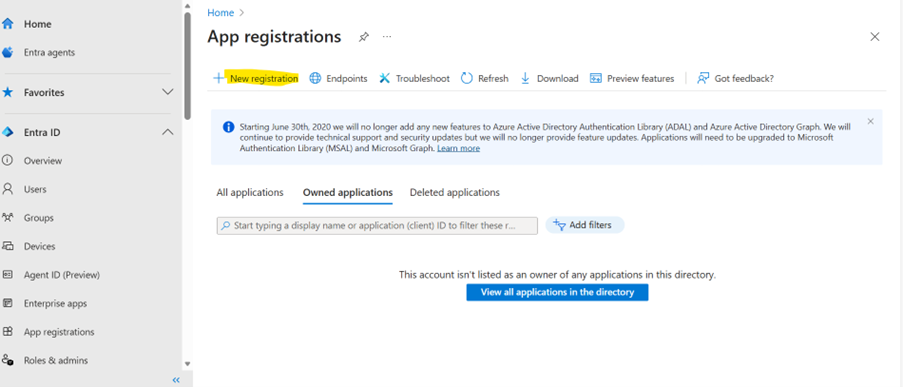
-
Enter the Application Name (for example, SMTP-OAuth-App) and select the Supported account type as Single tenant as shown below.
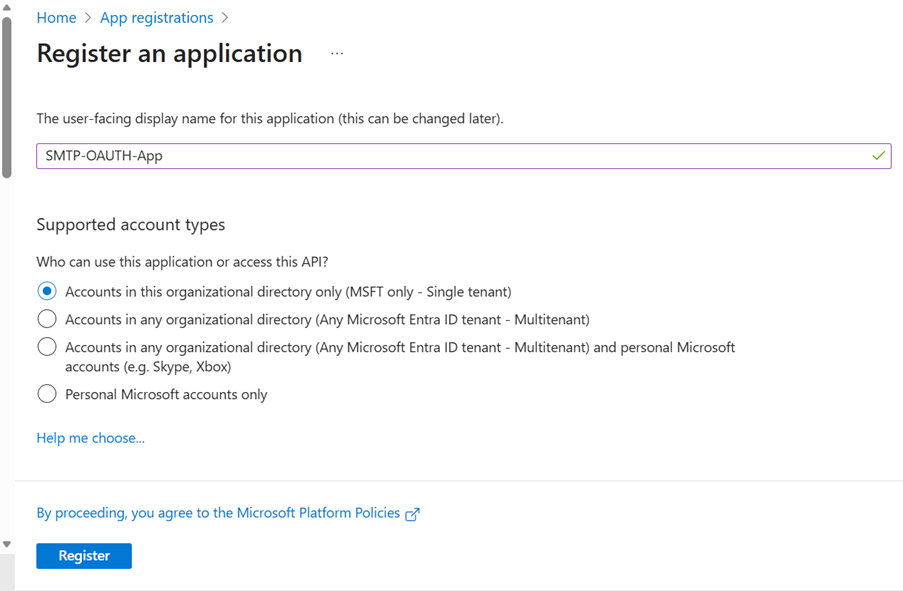
-
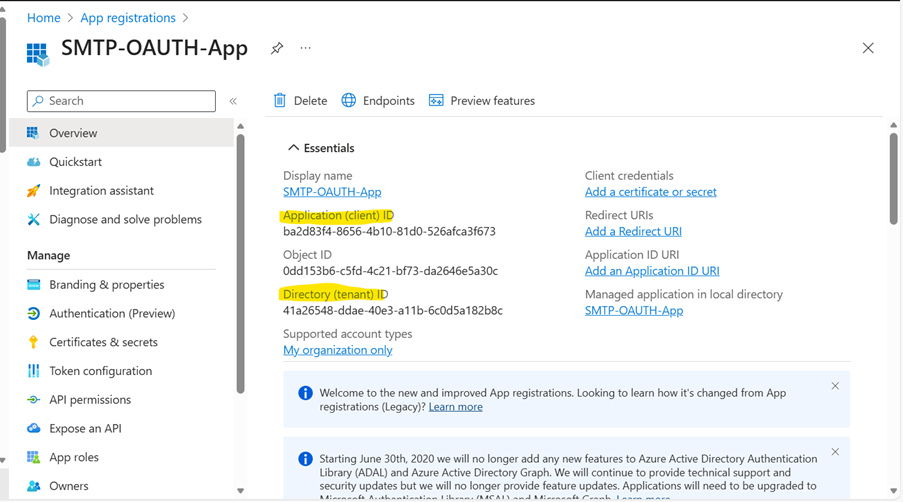
Click the Register button and after Registration, note down the Application (client) ID and Directory (tenant) ID. These values are required in code and token generation.
Client Secret Creation
-
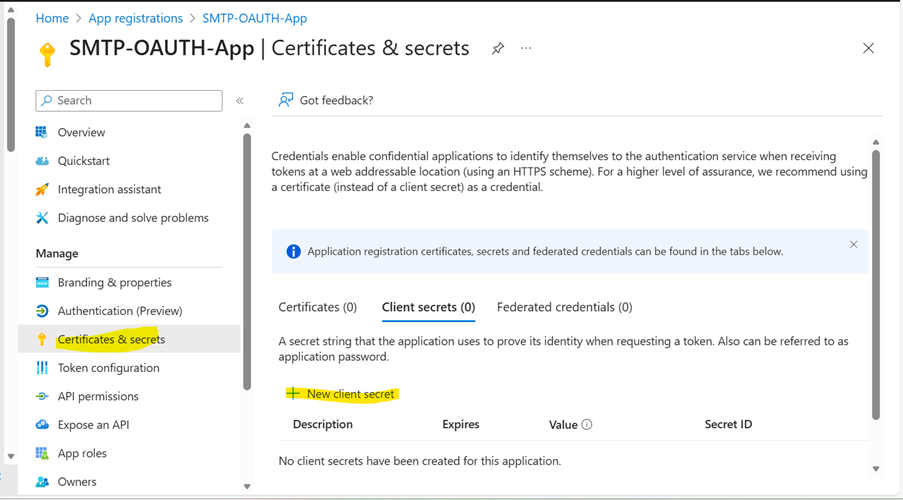
In the same window, using the left side navigation, navigate to the Certificates & secrets section and then select the Client secrets tab. Click New client secret.
-
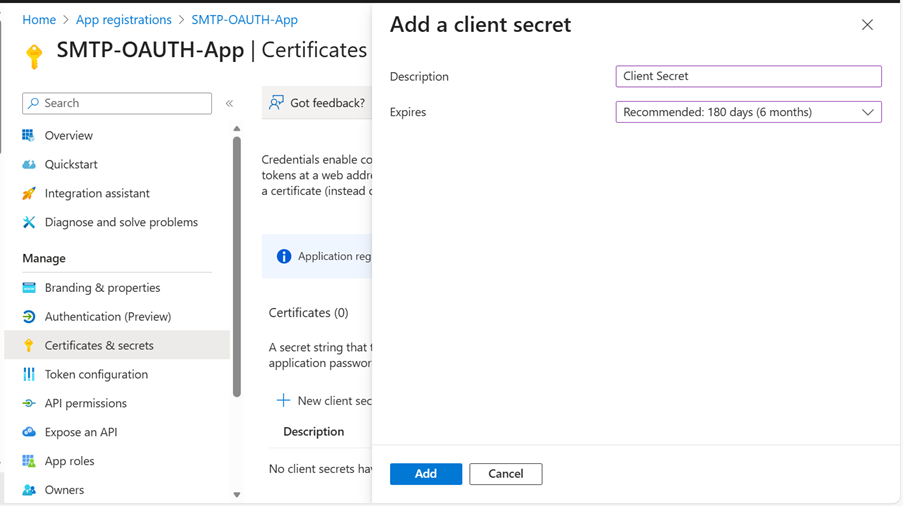
Provide the description for the client secret and when it expires (for example: Recommended: 180 days (6 months); however, a different value can be selected.
-
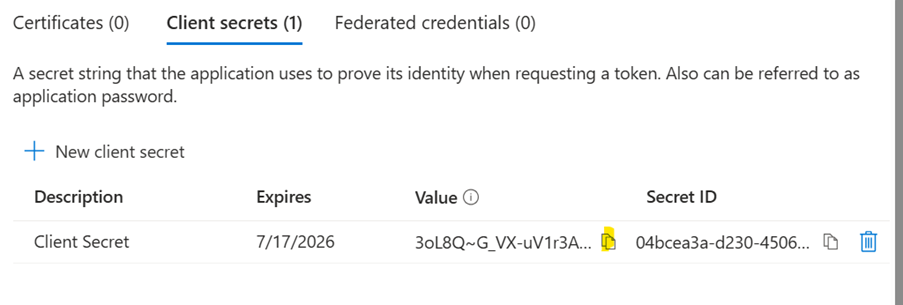
Copy the secret value immediately (it won’t be visible again) as this will be needed in csf.properties or conf.ini (BIRT).
API Permissions
This is the most critical step for the "Client Credentials" flow.
-
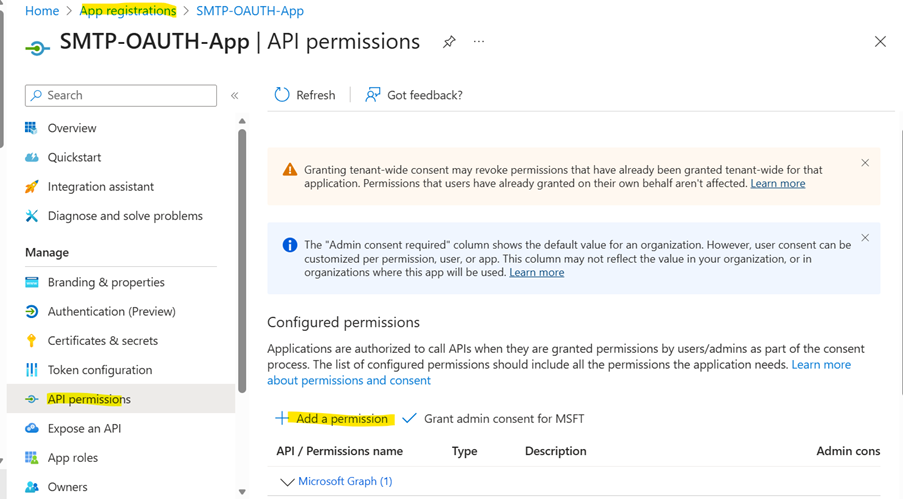
Go to API permissions > Add a permission.
-
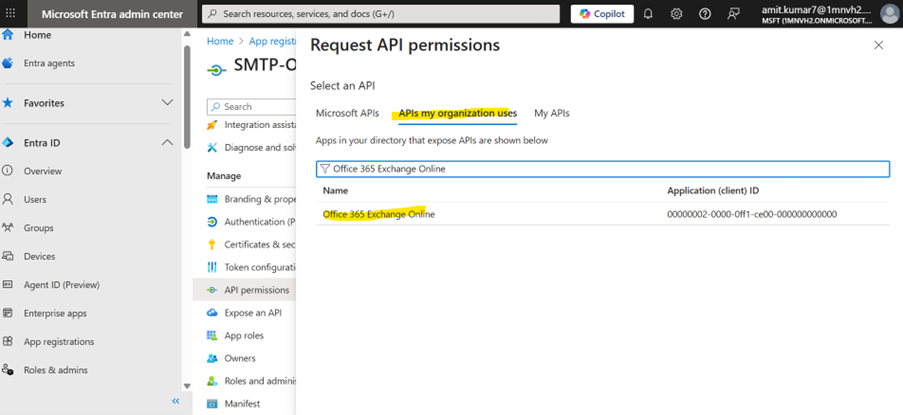
Select APIs my organization uses and then search for Office 365 Exchange Online and select it from the search results.
-
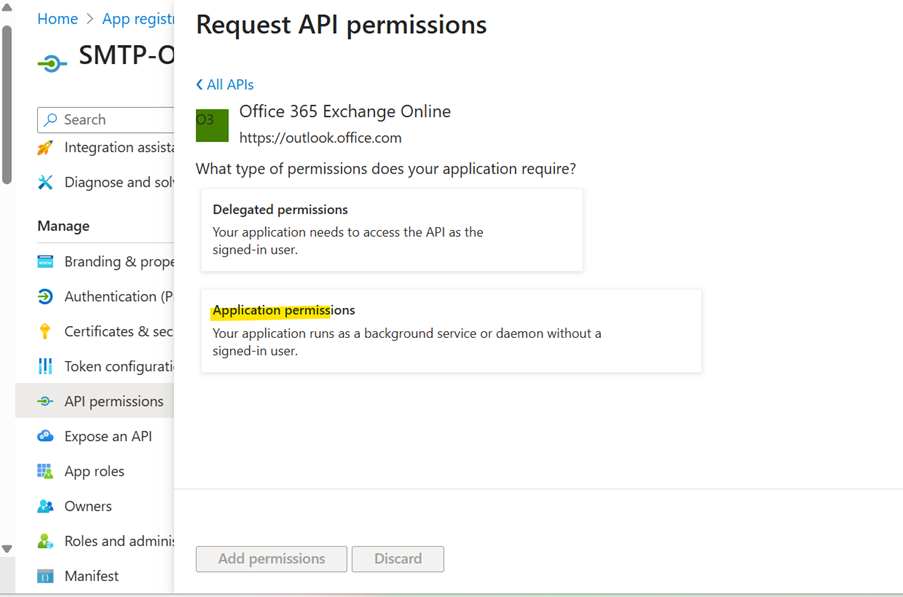
Select the Application permissions option.
-
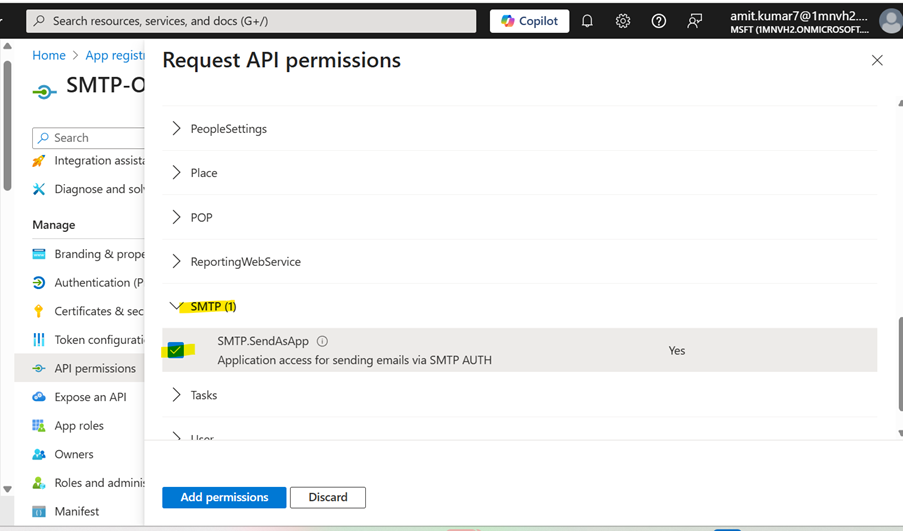
Scroll down to the SMTP section and then expand it to select SMTP.SendAsApp.
-
Click Add permissions.
-
You must click the "Grant admin consent for [Tenant Name]" button so the status shows as "Granted".
Microsoft Certificate Import
-
Identify the OAuth token endpoint.
https://login.microsoftonline.com/<TENANT_ID>/oauth2/v2.0/token. Replace <TENANT_ID> with the actual Microsoft Entra Tenant ID
-
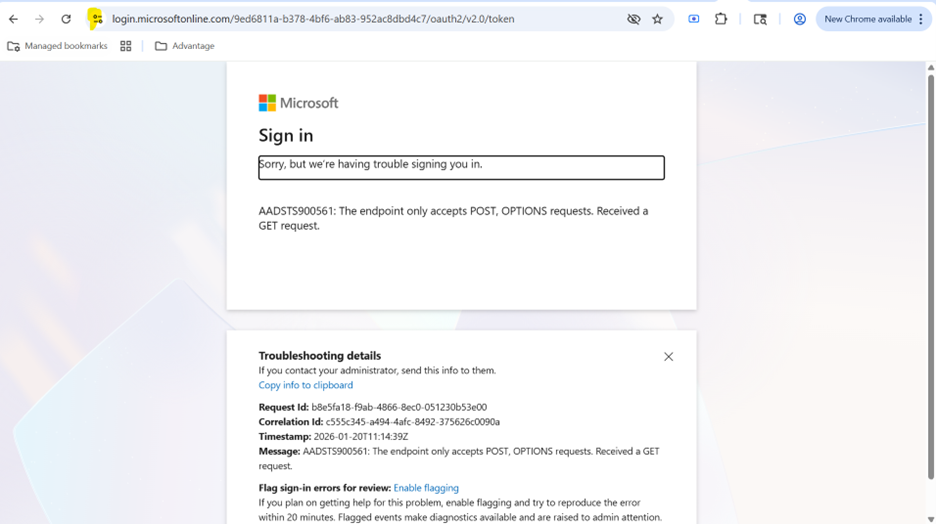
Open the above URL in a web browser using the actual Tenant ID. An error message indicating that the endpoint only accepts POST requests may appear, which is expected.
-
Click the “view site information” option in the browser which is located at the left side of the address bar and open the certificate details.
-
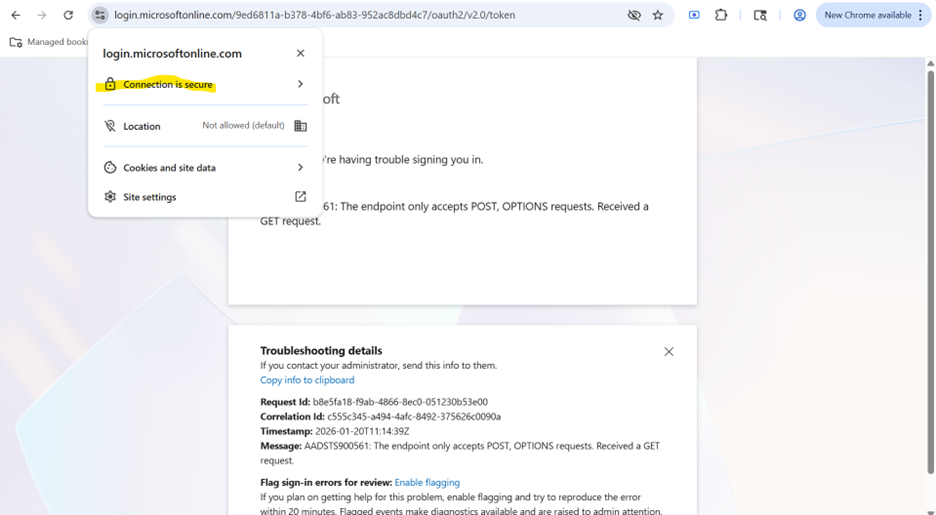
Click the Connection is secure option and then click certificate is valid to open the certificate viewer pop-up.
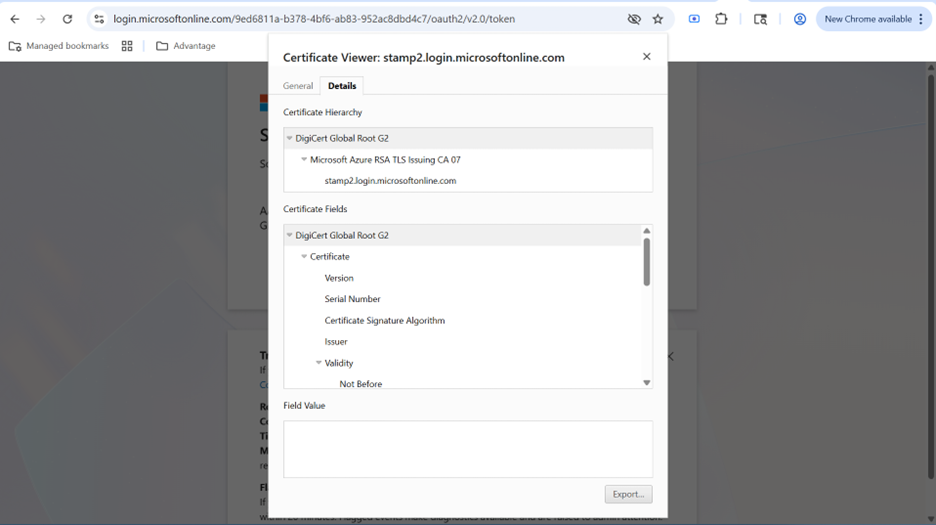
- Go to the Details tab and in the Certificate Hierarchy section select DigiCert Global Root G2. Then select DigiCert Global Root G2 in the Certificate Fields section.
-
Then export the certificate in .cer format.
-
Refer to the “Install Third-Party Certificate into ADV3.keystore” section in CGI_Advantage_4_Container_Deployment_Guide.pdf, for instructions to import the certificate into the ADV3.keystore file.
Enable OAUTH in Application
OAUTH can be enabled by following the steps below in the respective application:
-
Copy the csf.properties file from location
<NFS_Location>/RTFiles/<Namespace>/<Application>/Custom/Configuration/DefaultFiles/VLSEnv/< Application >/VLSComponents/Classes/ advantage_<application>.ear/lib
to
<NFS_Location>/RTFiles/<Namespace>/< Application>/Custom/Configuration/AppConfig/VLSEnv/< Application >/VLSComponents/Classes/ advantage_<application>.ear/lib
-
Open the file and modify the OAUTH parameters for respective values.
OAUTH.ENABLE=true
OAUTH.TENANT_ID=TENANT_ID
OAUTH.CLIENT_ID=CLIENT_ID
OAUTH.CLIENT_SECRET=CLIENT_SECRET
OAUTH.SCOPE=https://outlook.office365.com/.default
OAUTH.TOKEN_URL=https://login.microsoftonline.com/{tenant}/oauth2/v2.0/token
OAUTH.SMTP_HOST=smtp.office365.com
OAUTH.SMTP_PORT=587